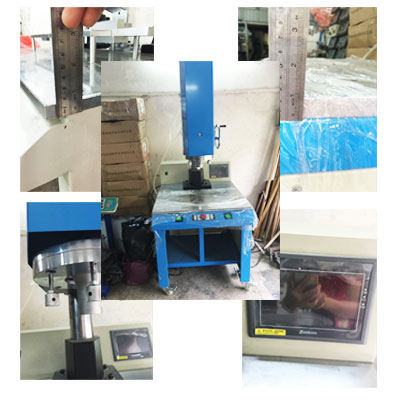
With the development of China's industry, more and more factories will choose to buy machinery instead of manual work processes. So we all need to pay attention to the ultrasonic plastic welding machine when using it. Do you understand? It doesn't matter. Next, Yihui will come to introduce you, let's take a look.
Ultrasonic plastic welding machine is very particular when used. The following should be noted when using:
1. Adjust the sound wave selection screw. The pointer of the amplitude meter will swing left and right, but it does not indicate the power output. It only indicates the resonance degree of the vibration system and the vibration system. The smaller the indication scale value, the better the resonance degree.
2. The amplitude table indicates the degree of resonance when no-load vibration occurs, and indicates the output energy when the load is excited.
3. Perform sound wave detection before welding to ensure resonance between the vibration system and the vibration system.
4. After replacing the welding mold, remember to do the sound wave detection program.
5. When adjusting, if the overload indicator light is on, immediately release the sound wave test button. After about 1 second, turn the sound wave adjustment screw for sound wave selection adjustment.
6. Correct tuning is very important. If you cannot adjust to the normal state and cannot meet the requirements of item 5 of the sound testing program, please send it for repair. Do not use it to avoid expanding the fault.
7. The working pressure should not exceed 5kg/cm.
8, the calibration program:
In order to achieve the maximum energy of the machine, the distance between the upper die and the workpiece should be as short as possible, but the necessary distance should be left for the workpiece to be placed and removed. The maximum travel of the lifting platform is 75mm, so before the calibration, it is determined that the upper welding die will not touch the workpiece during the maximum stroke.
1) Place the selector switch in the manual position and adjust the pressure adjustment knob so that the pressure gauge indicates about 0.2Mpa (approximately the minimum pressure that can raise the weld head).
2) Place the die on the work surface and place the workpiece in the lower die.
3) Relax the locking body of the body and turn the lifting handwheel so that the distance between the upper welding die and the workpiece is greater than 75mm, and tighten the locking hand.
4) Press the two lowering buttons with both hands to lower the upper die.
5) Loosen the four vibrating head fixing screws, rotate the upper welding die to match the workpiece, and then lock the four vibrating head fixing screws.
6) Loosen the screw and rotate it to the screw (M12x1) to make it contact with the lifting platform. Press the emergency rise button to raise the upper die and rotate it to about 7mm.
7) Press the two lowering buttons with both hands to lower the upper die. Relax the body lock and shake the hand, turn the lifting hand wheel, slowly lower the upper welding mold, and move the lower welding mold, so that the working surface and the upper mold are in uniform contact, and the locking body locks the hand.
8) Press the emergency rise button to raise the welding head and rotate it to the screw, which is about 2mm. The specific size depends on the workpiece, so that the screw can be disengaged from the lifting and lowering during operation. However, when the current welding mold has no workpiece, stopping the screw can prevent the upper welding mold from touching the lower welding mold and protecting the mechanical parts from damage.
9) Secure the lower die to the table with the screw platen.
10) The above operation is the calibration step. The more accurate calibration mode must be observed while adjusting, and the carbon paper can be used between the workpiece and the upper welding. After the upper welding mold is pressed, the white paper is displayed. Indentation, according to the depth of the indentation, the bottom of the welding mold is adjusted with a thin gasket to make the welding surface of the workpiece evenly pressed.
11) Direction and level adjustment method for the welding head with flat adjustment screw.
I believe that everyone has a certain understanding of the problems that need to be paid attention to when using ultrasonic plastic welding machines. So today, Yihui will not talk to everyone here. If you still have questions, please call directly. Contact us, we will contact you in the first time.

相关标签: